RFID Implementation Step by Step
Most RFID projects that fail do so because of planning, process and integration gaps, not because the radio technology does not work. This chapter gives a proven nine-step method from objectives to continuous improvement, with team roles, an example timeline, common failure reasons and a printable checklist.
- Start with business objectives and measurable KPIs, not with hardware.
- Map the current and future process before choosing tags or readers; RFID changes how people work.
- Test tags on your real items in your real environment, and run a pilot with written success criteria.
- Integration with ERP, WMS or other systems is usually the largest effort and must be planned from day one.
- Rollout needs training, documented procedures and an owner for ongoing support and improvement.
Why a method matters
An RFID system is not a product you switch on; it is a combination of tags, readers, antennas, software, data and changed working practices. Each element can be right on its own while the whole still fails, for example perfect hardware feeding data that no system uses. A structured method reduces that risk. The nine steps below are vendor-neutral and work for a single dock door or a nationwide rollout; only the depth changes.
Steps 1-3: Plan
Step 1 - Define objectives and KPIs
Write down what the business wants to achieve and how it will be measured. Good objectives are specific and tied to money or service: "reduce full stock-count time from 16 person-hours to 2", "cut dispatch errors from the current baseline by half", "complete annual fixed-asset verification in one week". For each KPI, record today's baseline. Without a baseline you cannot prove success later, and the ROI calculation will rest on guesses.
Also define the scope: which site, which items, which processes, and what is explicitly out of scope for phase one.
Step 2 - Map the process
Draw the current ("as-is") process step by step: who handles the item, where, with what document or system, and where errors and delays occur. Then design the future ("to-be") process with RFID. Decide at what level you tag (item, case, pallet or asset), where tags are applied and by whom, where reads happen, what event each read triggers, and what happens when a read is missing or unexpected.
This is where many hidden issues surface: items that bypass the dock door, mixed pallets, returns, or staff who batch their work in ways the system did not expect.
Step 3 - Site survey
Visit every location where readers will operate. Measure dimensions, door widths, ceiling heights and travel speeds; note metal structures, racking, conveyors and machinery; check power and network availability and mounting options; and scan for existing RF activity, including other RFID readers. The output is a survey report with marked-up drawings and proposed reader positions. The chapter on site survey and tag testing goes deeper.
Steps 4-6: Design and build
Step 4 - Tag selection and testing
Shortlist tags suited to the items' materials, size, environment (heat, washing, chemicals, outdoor) and required read range. Then test them on real items: try several placements and orientations, test items as they will actually be packed and stacked, and record read performance. Check the encoding scheme and memory requirements at the same time; see EPC encoding and memory.
Step 5 - Hardware design
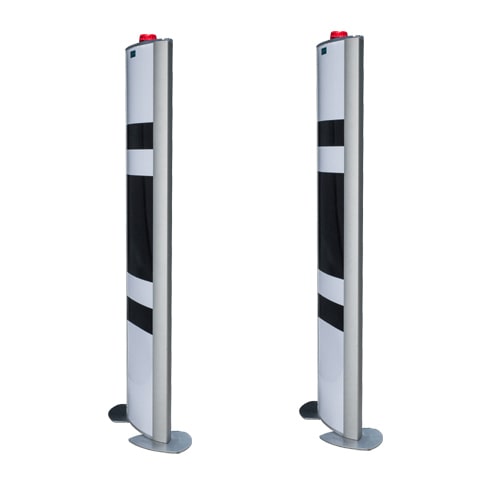
Choose the reader types for each read point - fixed readers, handhelds, printers, desktop readers - and design antenna count, placement, angles and power for each zone. Plan how operators will get feedback (lights, buzzers, screens), how equipment is mounted and protected, and how readers connect to the network. Confirm that all UHF equipment is configured for the local band (865-867 MHz in India) and legally compliant.
Step 6 - Software and integration
Define how raw reads become business events. Middleware or the application filters duplicates, applies rules (direction, zone, time window), and passes clean events to the ERP, WMS, MES or asset system through APIs, files or messages. Decide which system is the master for item data, how tag IDs are linked to records (commissioning), and how exceptions are shown to users. Plan security, user roles and data retention, and treat any personal data according to the DPDP Act 2023. Build and test integration in a test environment before the pilot.
Pay particular attention to commissioning, the moment a tag is first linked to an item. If labels are printed and encoded in-house, decide who prints them, how each encoded EPC is verified by read-back, and how voided or damaged labels are handled; see RFID printing and encoding. If tags arrive pre-encoded from a supplier, define how the supplier's data file is imported and checked for duplicates. Errors at commissioning propagate through every later process, so a few extra checks here save a great deal of exception handling downstream.
Finally, decide what the users will actually see. Operators need simple, immediate feedback - a green light for a complete load, a red light and a list of missing items for an incomplete one. Supervisors need exception reports and trends. Designing these screens with the floor champions, rather than for them, is one of the cheapest ways to improve adoption.
Steps 7-9: Deploy and improve
Step 7 - Pilot with success criteria
Run the complete solution - tags, hardware, software, integration and people - in a limited but realistic area, such as one store, one dock door or one department, for long enough to see normal variation (typically several weeks). Before starting, write down the success criteria: target read rates under defined conditions, KPI improvements, user acceptance and system stability. Measure honestly, fix problems, and repeat tests where needed. A pilot that reveals problems is a successful pilot; finding them now is far cheaper than after rollout.
Step 8 - Rollout and training
Roll out in phases, site by site or process by process, using a standard installation and configuration package derived from the pilot. Train every user group for its role: operators on daily use and exceptions, supervisors on reports, IT on support and configuration, and management on KPIs. Update standard operating procedures and retire the manual steps RFID replaces - running both in parallel for too long erodes trust and wastes the benefit.
Step 9 - Support and continuous improvement
After go-live, monitor reader health and read-rate trends, keep spares, and assign clear responsibility for first-line and vendor support. Review KPIs against the baseline monthly at first, then quarterly. Re-test when products, packaging or layouts change. Use the data RFID generates to find further improvements, which often deliver more value than the original objective.
Roles in the RFID project team
| Role | Responsibilities |
|---|---|
| Executive sponsor | Owns the business case, approves budget, removes obstacles. |
| Project / process owner (operations) | Leads day to day, owns the to-be process, signs off pilot results. |
| RFID engineer or integrator | Site survey, tag testing, hardware design, tuning. |
| IT / integration lead | Middleware, ERP/WMS interfaces, network, security, data. |
| Floor champions / key users | Represent operators, test the process, train colleagues. |
| Finance | Baseline costs, ROI tracking, capex and opex planning. |
| Quality / compliance | Traceability requirements, data protection, audit needs. |
For small projects one person may hold several roles, and an external partner such as our RFID consulting team can cover the engineering and integration roles.
Example timeline
An illustrative timeline for a single-site warehouse project with two dock doors and handheld cycle counting. Durations are indicative and overlap in practice.
| Weeks | Activity | Main output |
|---|---|---|
| 1-2 | Objectives, KPIs, baseline measurement | Signed scope and KPI sheet |
| 2-4 | Process mapping and site survey | As-is / to-be maps, survey report |
| 4-7 | Tag selection and testing | Approved tag and placement, test report |
| 6-9 | Hardware design, procurement, integration build | Design document, tested interfaces |
| 10-14 | Pilot at one dock door | Pilot report against success criteria |
| 15-18 | Fixes, rollout to second door, training | Go-live, updated SOPs |
| 19 onwards | Support, KPI review, improvement | Monthly KPI report |
Common reasons RFID projects fail
- Technology first: buying hardware before defining the problem and KPIs.
- No baseline: benefits cannot be proven, so funding for rollout stalls.
- Lab testing only: tags tested on single items, not real packed loads.
- Integration underestimated: reads arrive but no business system uses them.
- Process unchanged: staff keep doing manual checks, so RFID adds cost without saving any.
- Poor master data: tags linked to wrong or duplicate records.
- Uncontrolled read zones: stray reads from neighbouring areas create false events.
- No owner after go-live: performance degrades as layouts and products change.
Printable implementation checklist
| Step | Checklist item | Owner | Done |
|---|---|---|---|
| 1 | Objectives written, KPIs defined, baseline measured, scope agreed | Sponsor / process owner | |
| 2 | As-is and to-be process maps approved; tagging level and exception handling decided | Process owner | |
| 3 | Site survey completed: dimensions, metal, RF scan, power, network, mounting | RFID engineer | |
| 4 | Tags tested on real items at production density; encoding scheme fixed | RFID engineer | |
| 5 | Reader, antenna and printer design documented; local band compliance confirmed | RFID engineer | |
| 6 | Data flow, business rules and interfaces built and tested; security and privacy reviewed | IT lead | |
| 7 | Pilot run against written success criteria; results reviewed and issues fixed | Project team | |
| 8 | Rollout plan, training delivered, SOPs updated, manual steps retired | Process owner | |
| 9 | Support model, spares, monitoring and KPI review schedule in place | IT lead / process owner |
Next, work out the numbers in RFID cost and ROI. If you want to lead projects like this professionally, the Certified RFID Specialist Program covers each step hands-on.
Watch & learn
Videos are from YouTube and their respective creators; they play only when you click.
Help India adopt this fast-growing technology - teach, consult or build projects with Indian RFID.
Frequently asked questions
How long does an RFID implementation take?
It depends on scope. A focused single-site project often takes roughly three to six months from objectives to go-live, while multi-site enterprise programmes run for a year or more in phases.
Should we buy hardware before the pilot?
Buy only what the pilot needs, ideally on terms that allow changes. Tag and antenna choices frequently change after testing, so committing to full quantities early is a common and expensive mistake.
What is a good pilot success criterion?
A specific, measurable target agreed in advance, such as a minimum read rate for cartons through one dock door at normal forklift speed, or a reduction in stock-count time, measured over several weeks of normal operation.
Who should lead an RFID project?
A process owner from operations should lead, supported by IT for integration, an RFID engineer or integrator for the technical design, and finance for the business case.
Do we need a site survey for a small project?
Yes, even a short one. Checking the physical space, existing RF activity, power, network and mounting positions avoids surprises during installation.
Join the 1-month Certified RFID Specialist Program - live online. New batch 12 January 2027.